Its wedding season

June 1, 2010

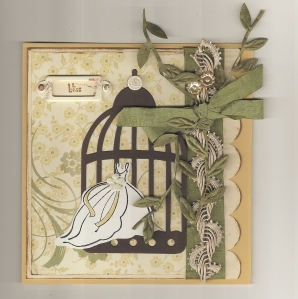
My husband and I are just getting to the point in live that we are going to weddings again,  this summer, a special wedding of my oldest daughter’s bff since they were six!  So a special card was needed.  By the way,  when I make cards,  I usually create a series since I have all the stuff out and have already made the mess.   Look at the wedding card for Mallory and remember I am on a mission to use my stash!


inside:

Ok here goes:

Stamps:  SU Blissful Bride (summer mini) — loved the dress stamp had to have the set

Paper: SU CS and DP

Ink: embossed classic black on dress; otherwise SU chocolate chip, SU marker

Tools: Time Holtz die cut bird cage; glue gun, EK scallop punch

Embellies: SU HPH frame and brad, Yellow Bicycle shop “Clothesline” Flower Stick Pins (at archievers now), moss taffeta ribbon (love taffeta it lies well and is so easy to make the bow), rayon vintage trim (picked up at a thrift shop), leaf shaped ribbon (need more of this — any clues where to buy it?) mini prima flower.

The difference in the cards is the use of the SU bird punch..I used an embossing folder and ran white confetti cardstock through it, then punched the bird and inked the top of the bird,  added a green rhinestone for an eye.  I also inked the cage in bronze for more depth.   I wanted a subtle inside, so I used the tone on tone bird punch as an accent for the greeting.  “From the Heart” is a SU Watercolor Trio stamp.
The leaf pins — enabler alert

June 1, 2010

If you can find them, the leaf pins are on sale at Joann’s– bought a few more packets this weekend for 84 cents! There are also heart pins. You can cut the pins down to a desirable size. I try to tuck them into the back side of the card and tape over them.

Happiness Always

June 1, 2010

I know…..its been a long time since my last entry.  My life is pretty busy, and I have another blog  www.codfashion.wordpress.com.    I have been busy creating even if I am not sharing. 

The first two cards that I would like to share with you use the SU watercolor trio,  this is a stunning set, hard to resist……

One of my new mantra’s is to use up my “hoard” of supplies…that does not mean that new paper, stamps and embellishments cannot be acquired, just that the stash needs to be consumed…I have to stop “saving it”.   I actually made 6 cards using bits and pieces of the same design,  I’m sharing my most favorites.  I think they will make great birthday cards, anniversary cards, etc..

From the stash:

Stamps:  SU watercolor trio

Paper: SU confetti white CS, Prima 2010 watercolor rainbow “whimsy” DP, and watercolor paper

Tools: EK Punch, Deckle Frame

Embellies: Prima flowers, pebbles, SU Hodgepodge Hardware, Leaf Pins – Joann Fabrics, Ribbon, lace and netting from stash

Technique:  Stamping with watercolor paper….used SU markers to paint on the color,  sprayed WCP with water…pressed stamp into water soaked paper then stamp onto a dry area of the WCP, to allow the image to bleed abit….every image is a little different, part of the charm and sophistication of the stamp.  I also inked my dp and cs and wcp with an olive ink….also inked the velvet ribbon to give it a vintage look.

If you want to see a great way to use up your stash, go to….     http://retrospection.typepad.com/ , she has a wonderful tutorial — her layering techniques are outstanding.   I just finished a doily quilt for my Aunt,  I’ll post it after Christine finishes hers.  I could make a 100 of these.

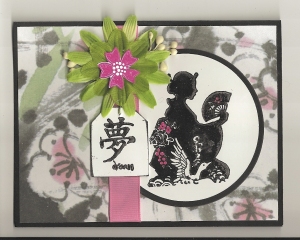
variation on a theme — Asian Dreams

August 12, 2009

With a desire to continue to  work with the Dream Garden stamp set…..I have been inspired about the use of circles in cards. 

The stuff:

  • stash designer paper (yes I am trying to use up my large and stunning stash — perhaps by 2025– for several years I had a fear of the scrapbook industry would stop producing and I would be left with wrapping paper– now I have enough for a natural or national disaster — a scrapbook emergency staff).  (I also have 9 gallons of water from 2001 in my upstairs closet–need to rework that stash)
  • back to the paper:  dp from kodomo inc plum blossom, su basic black, whisper white
  • su dream garden and eastern blooms
  • su melon mango and versamark, then basic black, embossed
  • su melon mango marker
  • from personal stash: grosgrain ribbon, embroidery floss
  • layered flowers and stamin
  • fussy cutting, tag punch and circle nestabilities

The card:asian dreams

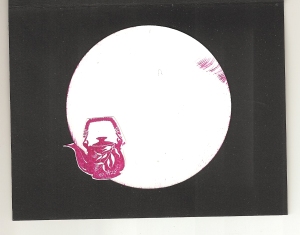
My favorite part – the inside: a place for a little note

asian dreams 2

mojo monday continues

August 11, 2009

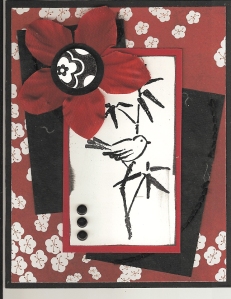
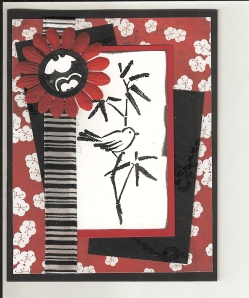
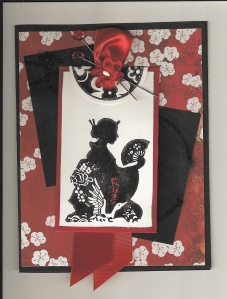
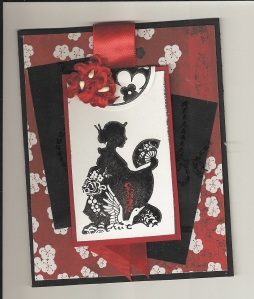
When I saw the sketch at mojo monday’s blog, http://mojomonday.blogspot.com/  it pushed my creativity and desire to stamp further.  I grabbed the stamps after finding the perfect piece of paper in my stash….I always pick up asian theme paper, just love the motifs, colors and balance,  so of course I ordered the new SU Dream Gardens and chose the hostess Asian Artistry with my July party.

The info:

  • card made from su basic black cardstock
  • layered with Kaiser craft’s Sakura Park red dp, an old piece of textured and stitched black paper, used su real red to mat image
  • on su whisper white I stamped on versamark, then su basic black, then embossed images
  • the japanese woman is from su dream garden, i colored the lettering in with a red marker
  • the bird image is from su asian artistry
  • the circle accents are from the new su circle circus — trim, punched, folded as needed
  • other accents:  1″ red ribbon and bw stripe ribbon, red flowers (the little ones are found at the craft store in the bridal area, brads and hatpins  from my large stash collection


scan0001scan0002scan0003scan0004

too cute – a little bundle of joy

August 10, 2009

My stamping mojo is back.  I spent all of July learning adobe photo shop (along story for another day).  I missed the ink, rubber, glue, yet I could not get back in the swing.  Even a new shipment from SU and great new colors, that I love, could not kick me back in place.  So what did I need?  A good old fashion humid Chicago day, to allow me to bury myself in a cool basement craft room, put a new baby in the mix and the crafting began…….

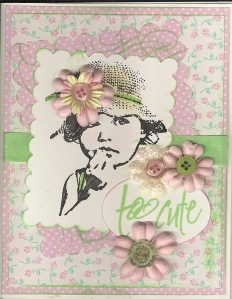
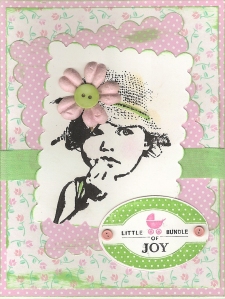
first two cards:  Paper Bag’s Studio’s darling baby

Fell in love with this stamp on splitcoast over a year ago and bought it..

  • goal was to use old paper — in fact it was 8 1/2″ x 11″  and 12 x 12″ that I purchased years ago when I first started scrapping
  • distressed the paper by inking it and stamping a scroll over it – to imitate the paper that I am addicted to purchasing:}
  • layered patterns; added scalloped cut pieces (used nestabilities)
  • SU pastels on hat and checks of baby
  • SU marker on hat band, and baby dress,  and on the SU Punches Three
  • MS rayon ribbon
  • button brads
  • prima flowers and buttons
  • “too cute”  Clear Expressions – Oh Baby Settoo cutelittle bundle of joy

a gift for a new baby’s grandmother

August 10, 2009

hi everyone

Trying to get back on schedule after a full summer, new computer and lots of planning …. like a daughter applying to Georgetown for grad school in June, getting accepted in July and having to move her this month!  And that is just part of the picture.

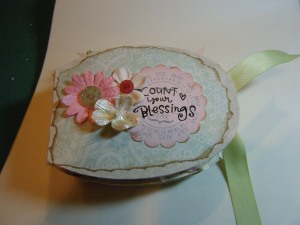
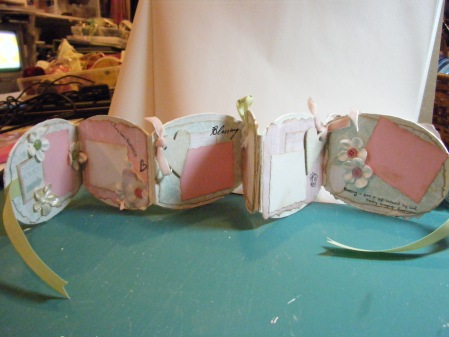
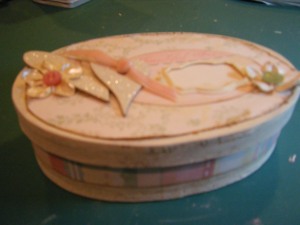
My first post is a gift for a friend who is a grandmother for the first time!  I created a mini album in a box.  The album was an extra kit from a Melissa Francis class at the summer 2008 Craft and Hobby Show.  

Highlights: 

It started with a craft box and album from Melissa Francis –

  •  but could be recreated by using a box from your stash and layering cardstock in an album
  • paint edges of box and albums with a mix of white and cream acrylic, let the craft paper show through a bit – paint a thin layer – dries quick!
  • tear  designer paper in rough shapes based on the layer you want to cover – distress edges and ink edges for vintage look
  • Melissa Francis rubons, stickers, chip hearts were used – don’t be afraid to distress edges of embellishments — and to cut apart stickers; add ribbons to chip board, layer pieces to add depth
  • Prima flower – fabric fancies collection and others…
  • Prima buttons in rose and green to match dp
  • painted the back side of album and inside of box with a sponge in cream and white and sponged pink to complete the look
  • Deckle edged spellbinder nestability for small picture mats


cover of album
cover of album

321front and top of box

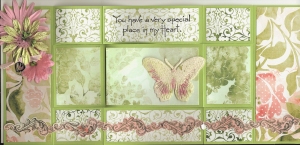
butterfly shutter card

May 29, 2009

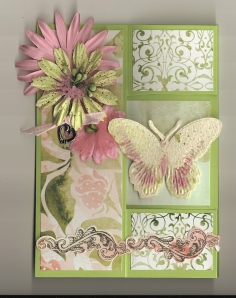
I so enjoyed making the shutter card that I made another — same stash and paper group as below.  This is for an aunt of mine who is going through a rough patch.  She is also a crafter, so I know that she will like the 3d details….again almost no stampin except for the sentiment from Northwoods rubber stamps, SU cardstock and BG dp.  Flowers from my stash — the green one is a Prima (and I insert stamen through the hole for texture, a heart charm was added with a ribbon — thank goodness for glue guns.  The butterfuly is a die cut and embossing from cuttlebug — I used watercolor paper, spritzed with Tattered Angels glimmer mist  (pearl)and then while the paper was still wet,  I added daps of color from my reinkers to shade and then respritzed with a green.  Just playing and I made a few of them so they are all in the stash.  The pink trim on the bottom of the card is from the Basic Grey package — it is a sticker.  I would recommend cutting it within the folds, matching your paper, this will make the sticker more flexible.  butterfly openbutterfly front0001

wedding shutter card

May 29, 2009

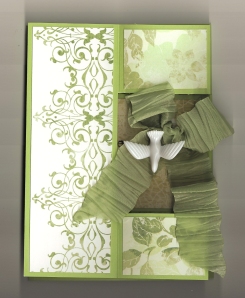
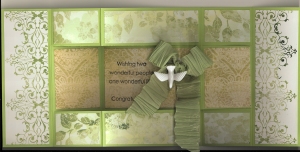
dove wedding cardA ” shutter”  card — so easy to make  and fits in a standard envie….  12 x 5.5″  score vertically at 2, 4, 8 and 10″, cut horizontal slits 1 1/2″ from the edges.  Fold as shown in picture 2 — not alot of stamping — just the sentiment from SU In my thoughts,  Basic Grey dp cut in strips to fit with the card — a scrap of ribbon from my stash with a small plastic dove from my valentine project (you can buy the dove’s in the bridal aisle at your craft store) and glue gun!  Fun to make — this type of card has so much potential!  This card is for a June family wedding.wedding dove inside
I’m back… expect some cute cards

May 29, 2009

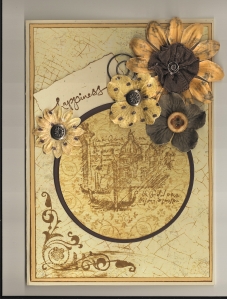
Rome weddingMy friend’s daughter and one of my former Brownies is getting married next week in Rome…….a great excuse to make a different wedding card….

and my first entry into the http://2sketches4you.blogspot.com/

Sketch #27

Using my stash is my motto for the next group of cards, so I started with one of my favorites SU’s cream confetti, layered a border of SU saffron yellow, then a dp stash for the background and circle (cut with nestabilities) — circle bordered in SU chocolate.  Stamps:  SU warm words — happiness, travel sketchbook and Flourishes Flourish……layers of flowers from my bin — brad, circle clip and button centers.   I took a piece of brown ribbon and gathered it into the large flower.